 By Ricardo Pinto.
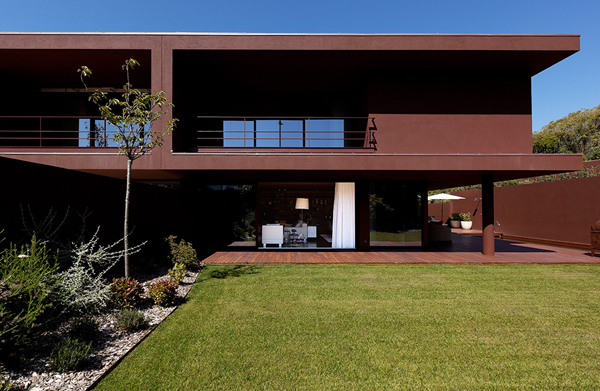
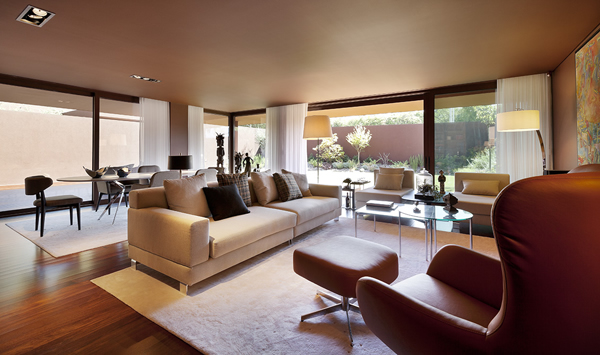
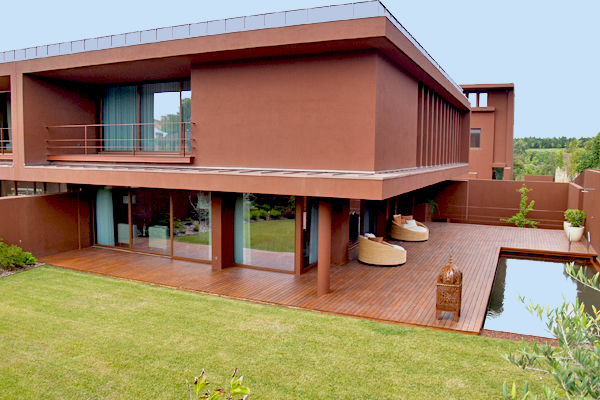
The Villas do Parque is a residential complex of 21 exclusive detached villas located near Castelo do Queijo, one of the most notable zones in Oporto, in a perfect symbiosis between nature and city. The project concept was planned at the beginning of 2012, and the implementation of the home automation solution started in the summer that year. As a systems integration professional, I was invited to work on this ambitious project, with a brief of providing a home automation system that provided comfort and security.
The initial plan for the home automation was way too basic for what I anticipated would be demanding customers, so I set about a complete redesign that would not only impress the customer, but also the team of architects who had designed the development.
The Solution
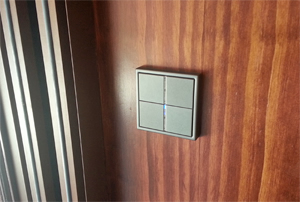
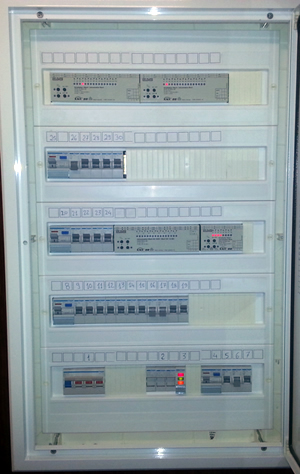
My solution was based on the KNX standard, and would involve a number of different systems and various carefully-chosen products. I chose Jung FD Design KNX push buttons with straight and modern lines for their aesthetic appeal. Their compact design fitted perfectly with the house architecture, and would allow up to 8 functions to be supported per push-button set. Jung actuators were placed in each cabinet for lightning and shutter control, along with other hardware such as the PSU and binary inputs. Jung was chosen for the quality of its products and its simple design.
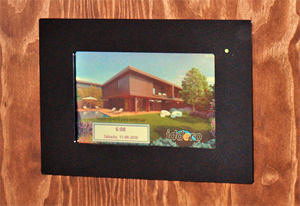
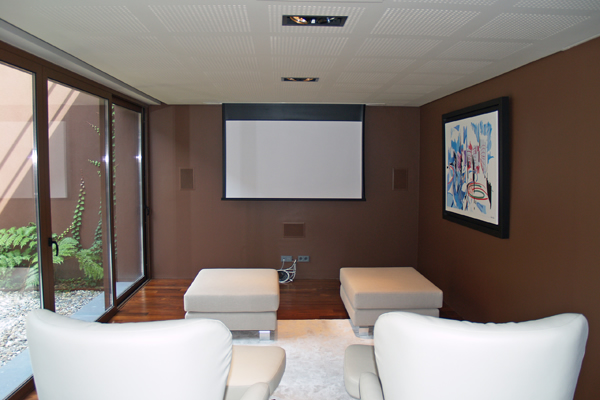
In this project the Iddero touchpanel controls every feature of the house, including lighting and shutters, VoIP door entry units, video surveillance monitoring, alarm system control and more.
For security, the house is protected by a Risco alarm system from that offers comprehensive security management features and integrates motion, smoke, carbon monoxide and natural gas detectors.
One of the planned features for this installation was to setup a video surveillance system with local recording. Installing a network video recorder plus IP cameras would be expensive, and I wanted to keep things simple and affordable. So I chose AirSpace and Dahua digital video recorders with analogue video IR cameras because of their ability to send streams from each separate channel over the network. The cameras are placed on the front and the back living room garden to protect the main entrances. The video surveillance system can seen on every television of the house, thanks to being connected to a UHF/VHF modulator. Also, the video surveillance system is viewable over the Internet by computer or smart devices, and also locally on the Iddero touchpanel.

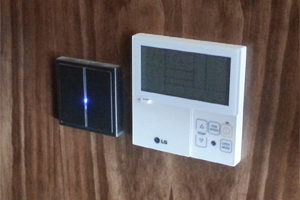
The HVAC system was already planned before I had even been approached about the KNX project, so I was pleased to discover that the team had chosen LG. This would allow me to use an Intesis gateway to integrate of LG air conditioners with KNX control systems. By using this gateway, the air conditioning system would be controllable anywhere in the world, from a simple laptop or smartphone, and locally over the KNX network.
As this project is part of a private development, I had to find a video door entry solution that could easily be integrated into each house, minimising the use of extra equipment. The solution was to use VoIP door entry units from 2N Telekomunikace, a leading European manufacturer of telecommunications equipment. These allowed me to easily integrate common and private area communications and access with the Iddero touchpanel, and since the VoIP units are PoE enabled, we only needed to use a single network cable for both power and communication.
The door entry unit provides some advanced features, such as taking snapshots and sending them via email when someone rings the doorbell, or redirecting calls to a smart phone or tablet when there is nobody at home.
The installation followed a specific strategy in order to ensure that the process would go as smoothly as possible.
The field team took care of all the wiring and equipment placement, while the fine- tuning of the installation was carried by me. We prepared the installation by putting in ducts and allowing for wiring for future upgrades of the home automation system and other components such as the AV system, security, etc.
The cabling was carefully accommodated behind the main walls and suspended ceiling, by leaving hidden trapdoors spread over the house, so that it would be possible to extend and maintain the installation. These trapdoors allow the quick addition of new KNX components, such as 360-degree motion sensors, new audio speakers, etc.
The connections of the circuits in the actuators were planned prior to installation, and before the programming stage, every single circuit was checked for correct connection to its planned KNX output.
Programming
Due to the layout of the house, I decided not to use the USB interface for connecting the KNX ETS to the installation as this would require me to be physically close to a bus access point in order to program KNX devices. Instead, I used a KNX/IP interface and a small Wi-Fi LAN, allowing me to program the installation from any location inside and outside of the house.
The programming planning was very easy, and was carried out in two-stages. The first was created at my office desk, buy outlining the structure of the installation in ETS. By using the CAD plans and the circuit connection plans, I was able to correctly associate each function to the correct circuits, and to carry the ETS file to the installation with the entire job done. Then, once connected to the BUS, the programming could be downloaded into all the participating devices.
The interconnection between the alarm central unit and KNX was done by using binary inputs for reading the alarm central relays, and by connecting some switching outputs from KNX to the alarm central unit zones. With this simple integration, we were able to arm/disarm each alarm partition from any KNX participant, and also to receive the alarm status on the BUS. These statuses are crucial for the Iddero touchpanel to fire off email notifications.
To guarantee extra security for remote communications by the end-user or the installer, a VPN-capable router is installed in each house. This extra layer of security allows us to encrypt all of the communications between the house and external devices such as the end-user smart phone or tablet, or a remote PC running ETS. I chose Cisco for this job because it has proven its reliability and construction quality in previous network infrastructure projects.
The system is programmed to send an email or SMS alert to the client when something important or critical occurs in the installation, such as an alarm status (for example, cut-off water valve when detecting a water leak), or when it is raining and the irrigation system is turned off.
The Iddero touchpanel provides visualisation and control of the entire installation by using simple 2D/3D plans, allowing the client to define scenes, timers, to watch the video surveillance cameras, the video door entry unit and to receive acoustic warnings. Furthermore, the embedded web server allows control of the home automation system from any smart phone or tablet (iOS or Android).
Experience from the Project
Overall, the project was planned, designed and implemented over a period of six months. As soon as the planning and design was finished, the ETS structure and programming took only two days – one at my office desk, and the other at the house downloading the programming. After that, a couple of days were needed for testing all of the functions, and the job was done.
Since completion, some of the equipment for the next 20 houses of the development is going to be changed to different colours or shapes, but the core of the installation structure is being maintained.
So far, this has been one of the largest projects in which I have been involved. It has become the award-winning project of the first Iddero-Futurasmus project contest, and has been praised by several home automation professionals and private customers. This international recognition has encouraged me to work even harder and to maintain a high level of professionalism.
Conclusion
Using KNX products allowed me to meet the requirements of highly-demanding customers, with simplicity, user-friendly interfaces, and top security. From the customer’s point of view, having a KNX infrastructure given them the confidence that such a reliable, secure and open system brings.
This project could have been a simple expression of architecture and design, but by integrating KNX into the design, it turned into a truly magnificent work of modern technology that empowers an exclusive living experience.
Equipment List
Iddero touch panels
Jung actuators and push buttons
Risco alarm system
2N Telekomunikace Helios video door entry
Provision video surveillance cameras
LG air-conditioning system
Intesis air-condition KNX gateway
Creston/Eissound audio
Draytek/Cisco VPN capable routers
Ricardo Pinto is an IT professional, with several years of experience in systems integration, project management, R&D and engineering. During his career he has been participating in several projects based on home automation, access control, security, VoIP, computers, networks, software development, smart phones and gadgets.