
In the final part of this three-part series aimed at KNX professionals without a hi-fi background, Simon Buddle looks at home cinema.
We’ve looked at how we might bring audio into our world. Multi-room audio is straightforward, requiring a simple understanding of cabling and basic speaker placement. Moving on from this, we looked at Hi-Fi or the stand-alone music system – a land typically inhabited by the geek. In the last of this series, we’ll look at home cinema.
Home cinema comes in many shapes and sizes, from the simplest sound bar to the most complex Dolby Atmos double-digit speaker systems with specialist seating, acoustic panels, absorbers and reflectors and stepped seating stacks; danger – deep water! There are of course, two elements to a cinema, namely sound and picture. For the purposes of this article, we will keep to simple screen technology and a basic audio setup.
Preparing the room
Before we explore the home cinema, let’s look at one of the most basic principles of any movie room. The ideal scenario is for complete blackout, which gives the best possible visual experience. This means taking control of both the lighting and any natural light by having blackout blinds installed. From a KNX perspective, that’s completely within our sphere of control. Indeed we are the perfect people to solve those problems.
Screen
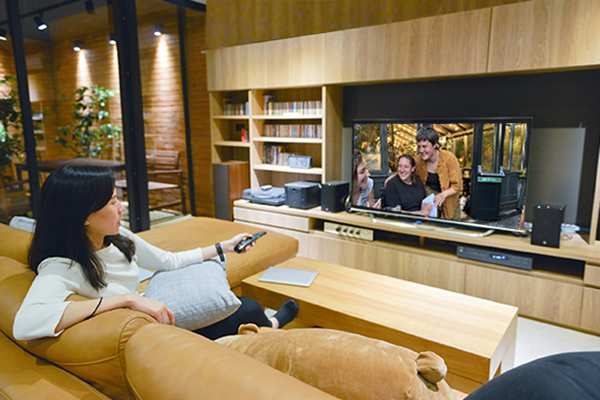
If it’s a smart TV (and most likely it is), it may be the only device in the system, except for a soundbar. Probably the most important factor with any screen is to define and agree the resolution/quality the customer is looking for. It’s easy to say ‘let’s just go for the best’, but 8k may not be right or relevant given the screen size or seating position. What is critical is that all of the components in the visual chain, from set top box, AV amplifier, cables et al, are all capable of transmitting the signal. That signal path from source component to TV must work as a single entity. So, settle on a screen resolution and work out the components from there. The height of the screen is determined by eye level at the viewing position, i.e., the centre of the screen should be at eye level.
The simplest setup is screen and soundbar. For this, all you need to check is that the TV has any one of the following:
- HDMI output marked with ARC (Audio Return Channel).
- Bluetooth.
- Coaxial audio.
Check the same for the soundbar, and you’re good to go. With most new TVs, it is possible to setup a faux surround sound using a soundbar, so that’s all you’ll need. All new Smart TVs are loaded with Apps for the likes of Apple TV, Netflix, Amazon Prime, YouTube etc. This means for most people, 90% of their viewing requirements are instantly dealt with.
Bringing in set top boxes such as Sky, BT or even a Blu-ray or DVD player may then require the addition of an AVR (Audio Video Receiver). There are three fundamental advantages to adding an AVR into a system:
1) It offers more AV inputs than a standard TV.
2) It has better-quality surround sound processing.
3) It has the ability to add high-quality audio speakers to give 5.1 channels of audio.
AVR
The AVR is a wonderful piece of kit that truly enhances the cinema experience. Most now come with automatic or semi-automatic setup instructions along with a small microphone to enable speakers to be correctly calibrated. The surround sound modes provide for different ambient sounds subject to what the customer is listening to. Music, for example, is best listened to in stereo rather than a movie surround sound mode. Click here for a list of the most common surround sound modes.
Speakers
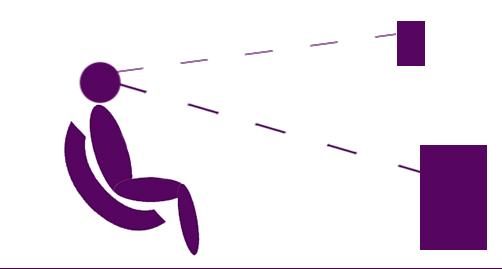
The final link in the chain is the speakers. These would ideally be bought as a package from a single manufacturer. The simple reason being that they were most likely designed to work together and aesthetically they will all match. The term 5.1 or 5.2 simply indicates the number of speakers. Front left, centre channel, front right, rear left, and rear right make up the 5 element, and the .1 or .2 defines the quantity of subwoofers in the system. Use good-quality speaker cables for all speakers if you can. The final two elements to consider for speakers are height and position. Ideally the tweeter (small high frequency speaker) should be at ear level to the primary seating position.
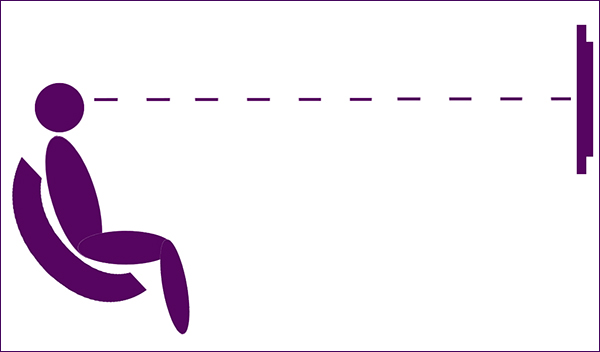
Primary seating position
This is the location where the best audio and video can be experienced. It is the location where all measurements should be calculated to, including viewing distance and speaker level setup. With an AVR that has a setup microphone, this is the location where the microphone would be placed during the calibration process. As I mentioned earlier, most AVRs have a built-in setup procedure which will get you 90% of the way to a great-sounding cinema.
Conclusion
This is only the tip of the iceberg for home cinema. You’ll need to know about TV brackets, wall strengthening, in-wall or ceiling speaker configurations and much more. To gain further knowledge on cinema setup and go beyond the relatively simple 5.1 channel setup, you’ll need to investigate some training from the likes of CEDIA or Avixa. There is also a huge amount of good training available from manufacturers and distributors alike, but theirs will more likely be geared specifically towards products they sell.
As with all new skills, take little steps, focus on the underpinning knowledge and principles, and then you can set sail into the vast sea of home cinema design and installation. But once you’re involved, not only will you derive a great deal of pleasure from working on cinemas, but hopefully your customers will too, and in doing so, you will add another income stream to your core KNX business.
Simon Buddle CEng MIET, is a consultant for Future Ready Homes, a specialist in BMS and ELV services system design.