By Simon Buddle, Future Ready Homes.
Many years ago, I worked on a video installation in a swimming pool. The displayed film had been specially recorded. It spanned a huge sweeping landscape capturing beautiful mountains, and in the foreground, the meadows and foothills. The aspect ratio was 5:1 and the film was to form the backdrop on the wall to the far side of the pool. At 3m high and 15m in length, the image had to be ‘stitched’ together using clever software and three projectors.
During the design phase, whilst being pushed for a better price, I came up with the solution that involved a 14m-wide image and moving the pool wall in by about 800mm. That would save about GB£11,000 because we could do the installation with only two projectors. At which point the developer pointed out that moving the rather large wall by 800mm would cost him the better part of £15,000 due to the lost square footage of the room. Lesson learned. Ever since, I have always been acutely aware of how precious space is in every home. Every centimetre counts.
On the opposite side of that coin we have the problem of consumer units and KNX panels being stuffed into unfeasibly small spaces that make working on or maintaining the system nigh on impossible. It is a tricky conversation, at the design stage, to suggest that you need to be able to stand square on in front of the KNX panel to look after it in years to come. You are always assured that no additional circuits will be added, so if you could keep the panel as small as possible that would mean the utility room could be an extra 1m wide. But we all know what happens after that; we end up squeezing in an extra module.

Calculating panel size
Just how many modules fit in a panel? I do not think that this is really the question that needs to be answered when sizing the metalwork. I think we should be asking ourselves how many control cables or circuits we can fit in. I like to allocate the top DIN rail of the panel, always, for outgoing circuit connections. From a design standpoint, I believe the electrical contractor should only be responsible for connecting to the incoming main isolator switch and the outgoing circuits. Everything in between ought to be pre-wired and tested offsite.
For example, if we use one of the Future Automation KNX5 panels, the top DIN rail is 550mm wide. The connectors that I use are 5.1mm wide, annoying maths I know, but 550 /5.1 gives me a maximum of 107.8 connectors that can fit. So, let us round it down to 100, that is, 50 circuits. If we have blinds, DALI or 0-10V, that will reduce further. That broadly gives us a simple way of calculating panel size as one circuit = 1cm.
Saving space
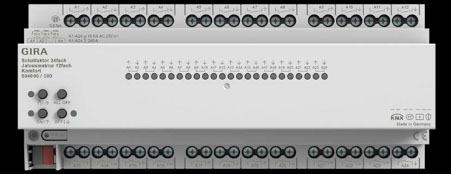
Gira, Jung and ABB are all working hard to provide their dealers and end users with better-value-for-money products, and to that end, we are starting to see a new set of high-density actuators come to market. The promise of 24 switching outputs in an actuator that is 12 modules wide means that we now have a product that is smaller than the outgoing connector block.

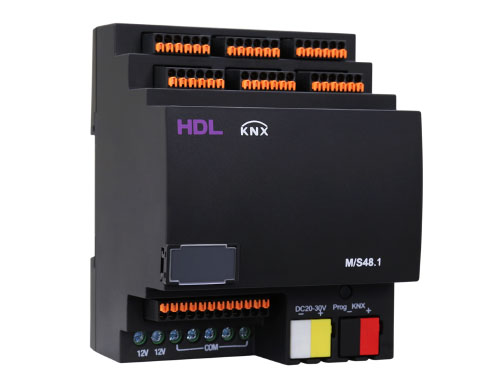
HDL has a great new product that houses 48 inputs in a 4MW (Mounting Width) module. Power supplies are also getting smaller, and the need for line couplers has reduced. Cumulatively, all of these elements may tempt us into reducing our panel size.

Conclusion
It is often difficult in design team meetings to hold on to the tiny bit of wall space we have been allocated, but the solution is a drawing showing the panel size and maximum connections. Whilst empirical data will overcome such issues, you must be ready to throw it into the mix at the appropriate time and be prepared to fight your corner. Just because the architect saw the latest new module with 24 outputs does not make them an expert in how much wall space you are going to require.
These new modules and the ever-present need to keep space requirements to a minimum may force some into compromising on their panel design, but always keep in mind the extra circuit that will, no doubt, be added and how easy it will be to maintain the KNX system in the future. Good design provides the solution to correctly-sizing the metal work; inputs and outputs from panels require connections, and that is more of a determining factor than the number of modules. Good design also provides space for expansion, operates at a safe temperature, is accessible and facilitates easy maintenance.
Remember, not only will the customer be yours for life, but hopefully the maintenance of the system will be too – and perhaps even after the customer has moved to a new property!
Simon Buddle CEng MIET, is a consultant for Future Ready Homes, a specialist in BMS and ELV services system design.


